

The alarm goes off, you roll over to turn it off as you take a glimpse at the time, 6 AM.
Sigh, it’s okay, time to eat before heading to the gym. As you gingerly roll out of bed, you go to stand only to feel stiffer than usual. You make your way to the kitchen and are met with an immediate uncomfortable sensation. You continue to move but this sharp debilitating pain starts running throughout your back and radiating down your leg. As the sensation increases, you are frozen by the pain.
Tell me if this sounds familiar:
You sneeze and throw out your back
Bend over to tie your shoes, throw your back out
Rotate to place an object on the floor from a seated position and are met with back pain.
What all these innocuous scenarios have in common is that they’re not the reasons why your back hurts. They were the last straw, a coincidence because no one would argue that sneezing or tying your shoes are mechanisms for low back pain. There’s no such thing as non-specific back pain, only reasons that have yet to be snuffed out.
(2024: All continues to ring true, it isn’t so much the act of bending over to do something or lifting in a particular way that injured the back, but the accumulation of the load through tissues that weren’t properly trained and have now yielded.
I also disagree to the extent that we can have non-specific back pain in that we cannot point to the exact cause of the pain. This is also a shortcoming of research in that all low back pain, even similar presentations are different, and therefore extrapolating that to a larger population has its limitations.)
Relax…You’ll be Okay
Many individuals come into my office with some kind of “generic” back pain or self-diagnosed sciatica. Their pain is real and they don’t care so much about what it is (at least not in the moment) and are more interested in if we can get rid of the issue.
After tissue exploration and manual therapy, we stand up to perform some exercises to help improve the tissue’s capacity. I’m quick to let them know it’s not as bad as they think and that together we can solve this. Not surprisingly, most individuals I’ve worked on will remark that they feel immediate relief.
I’m not some magician, but I let clients know that bending over, sneezing, or standing up wasn’t the reason for their pain. Instead, it was one of the following reason(s).
(2024: This whole list is fine but I don’t love the framing of it from a nocebo perspective. Meaning, that if you don’t do these, you’ll have back pain, which is not true.
I still believe that much of the lower back problems that plague people often comes down to any of the following things below)
Your spine moves when your hips should
By now, most know that if you’re always putting yourself into bad spots, it’s not if but when will you get into trouble. Your body is no different.
(2024: It should really say if you’re only moving in one particular way, its a matter of when not if you will likely end up with some trouble.
The way I wrote this originally sounds real doom and gloom)
The topic of posture is at the current forefront of social media with polarizing views that you have to be a certain way for perfect posture or that posture doesn’t matter. The truth is always somewhere in the middle. If you’ve read my work on Instagram you’ve heard me say this but it begs to be said again:
“The best posture for you is one that is always changing.”
Your movement capacity is the same. Say you have a job that requires you to bend over and move 15 lb sandbags. If you were only required to move 10 bags, you could move them however you felt and likely be fine. But if you needed to do that for 8 hours each day, 6 days a week; you’re probably going to want to move in a biomechanically sound manner.
Learning to hinge, disassociate the hip from lumbar movement, and rotate well all go a long way in improving load-bearing capacity and providing you with different ways to move.
(2024: most of that is still solid, if you only know how to move one way, learning options is always a great idea)
Related to movement from the hips and not the lower back would be the ability to contract into hip extension without compensation. Lying on the floor offers a great deal of stability and lets you see what each side is capable of doing.
If one can’t get good hip extension while lying down, there stands a solid chance there is excess motion elsewhere when upright. Remember it’s not the movement itself that needs to be a particular way, rather it’s needing more options.
(2024: same same)
Your Spine Doesn’t Segment Well
Can you Cat-Cow? Many have performed this ubiquitous yoga movement, but few have used it to asses their capacity to move their spine.
Common for individuals with lower back pain is an inability to move segmentally through their lumbar spine without overly hinging through their mid-backs. When this is the case, a hinge point develops and this is the site of stress. The back is a bridge, so the load should be evenly distributed versus being placed just in one section of the vertebral column.
(2024: I agree with 90% of what I’ve written with the exception of the hinge point comment. While I may visually see a hinge point, we can’t assume that this is the exact site where you’ll have pain. Even if anecdotally all the spines I’ve assessed with some degree of discomfort show up with a TL junction hinge point.
Research says otherwise that you can have a hinge point and be asymptomatic, so there’s that.)
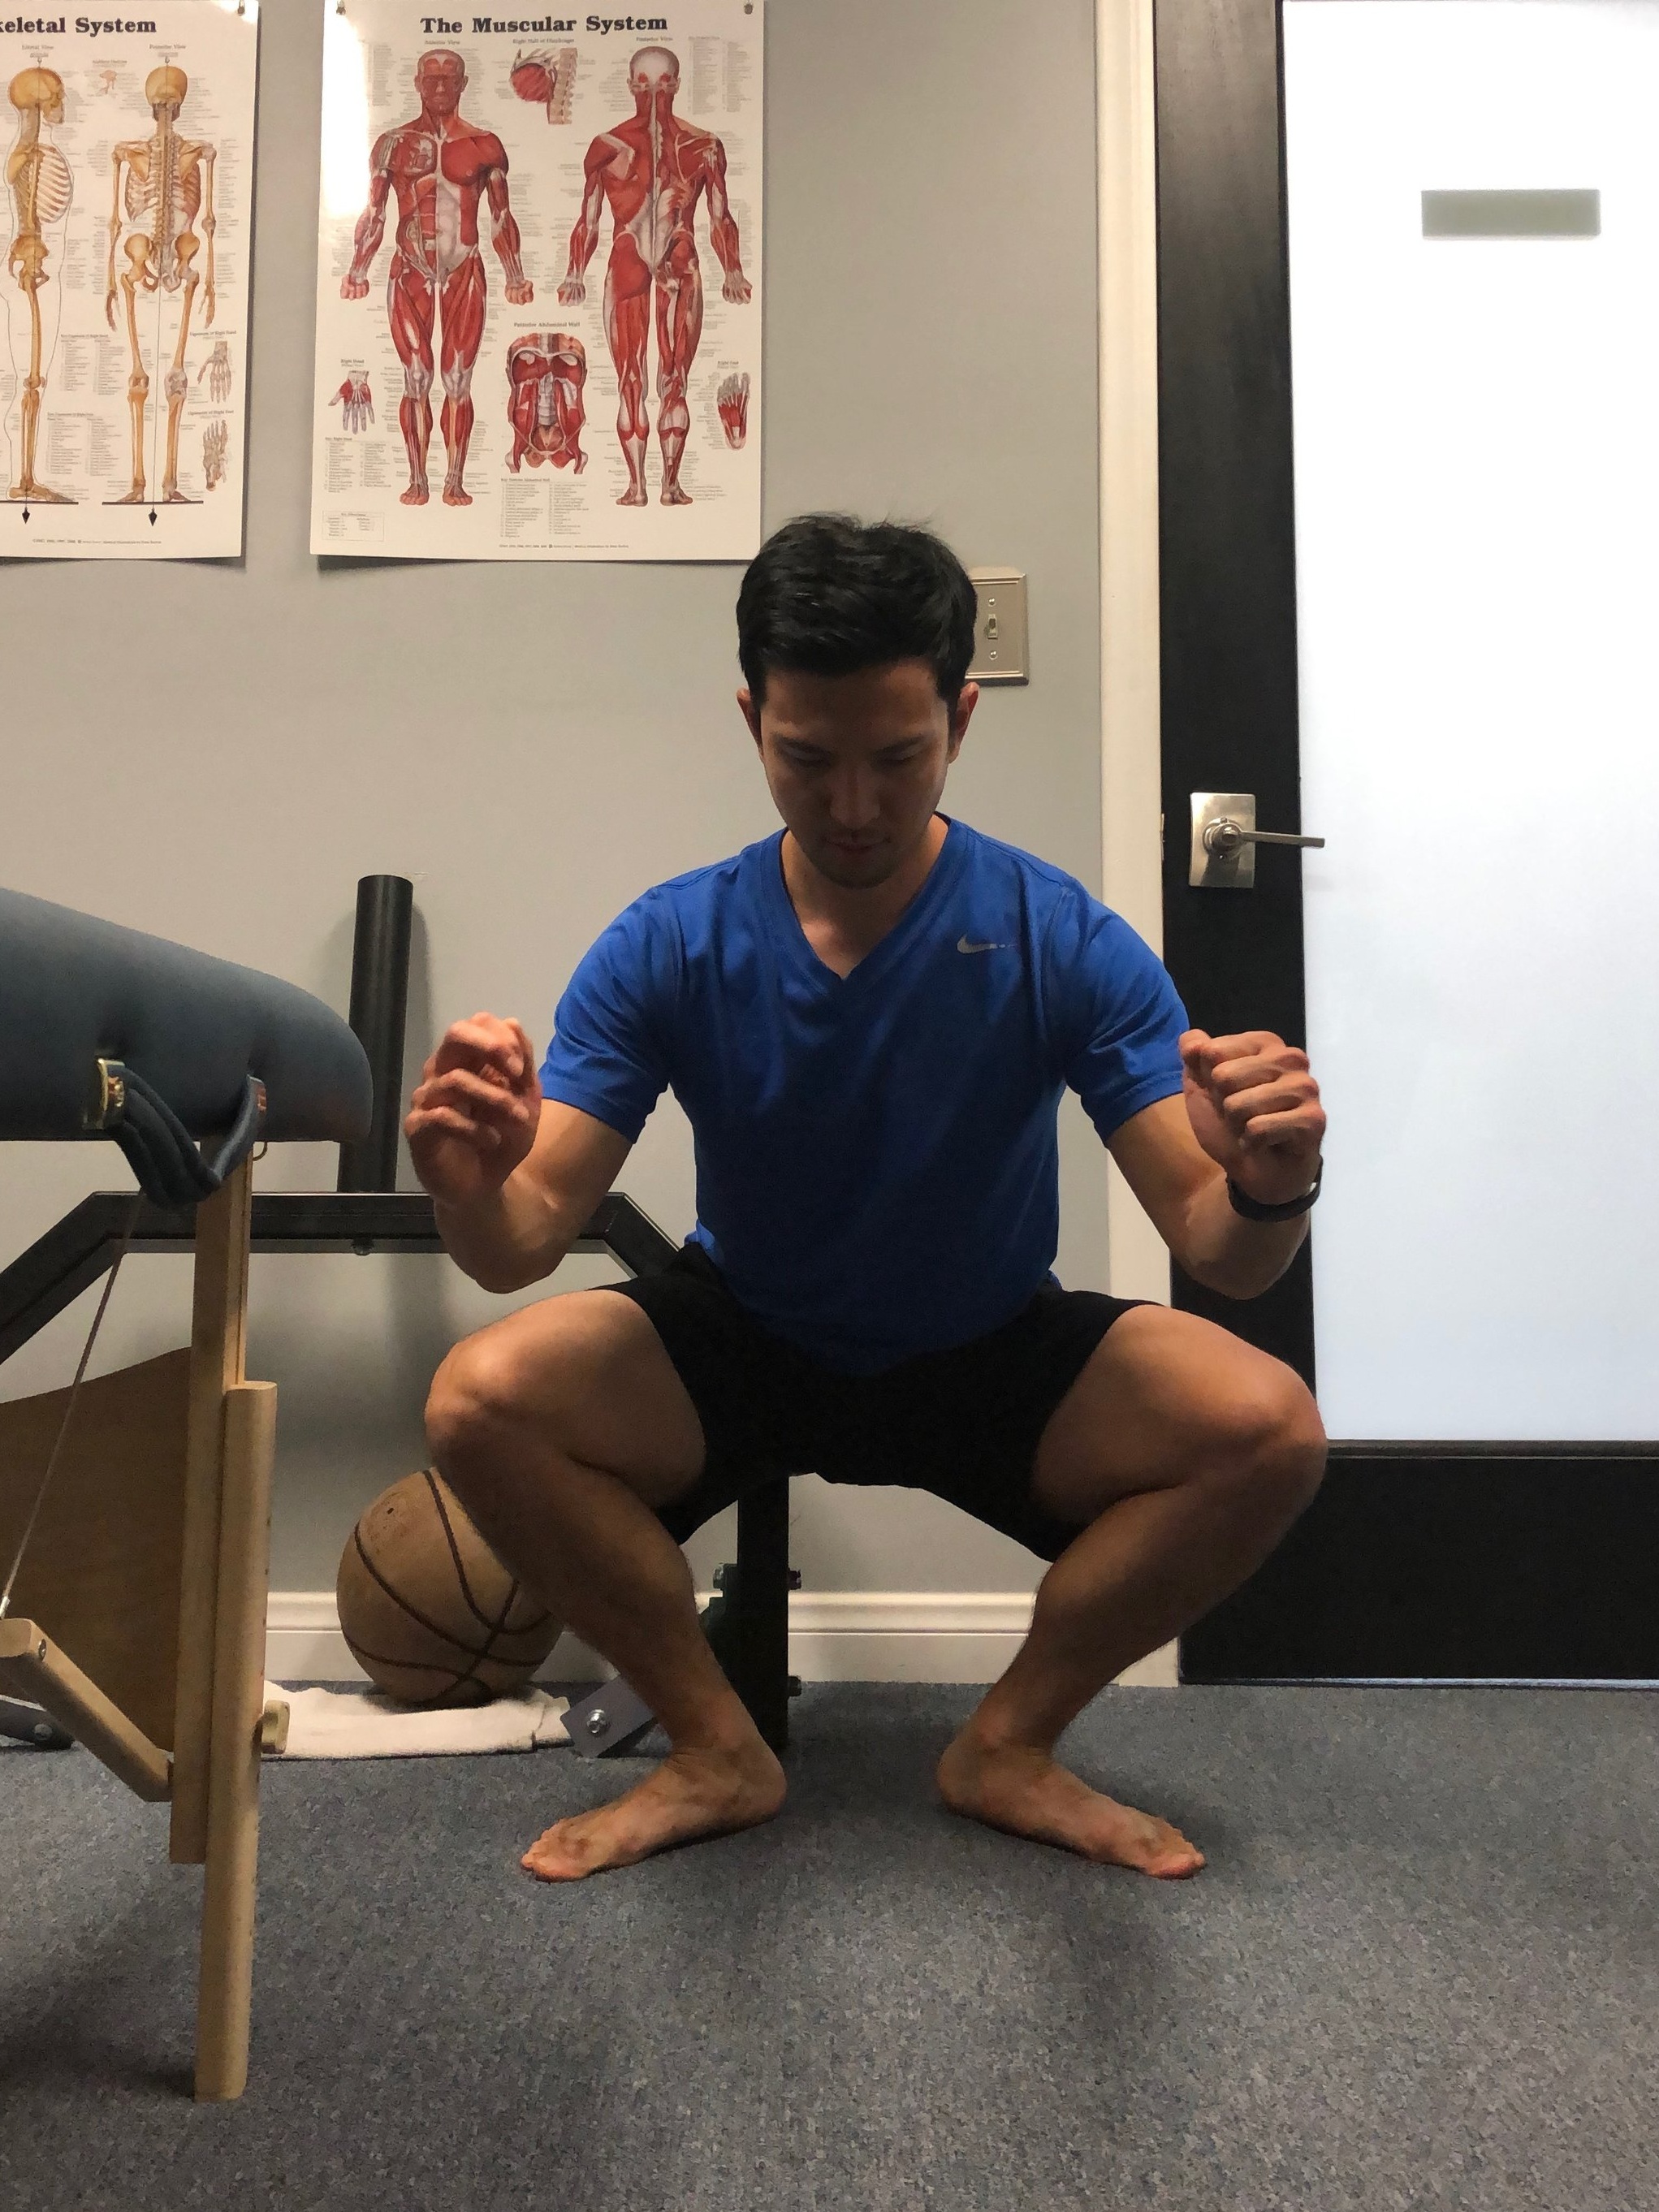
Your Hips Don’t Move Well
Single leg stability: You should be able to drop down to about an equal depth on both sides. This is an easy way to assess whether one hip moves better than the other. Things to note would be how smooth each side feels and if the foot/knee collapses during the squat.
(2024 neuromuscular retraining is still important)
The RNT split squat is a great way to help shore up the strength and their stability on that side. The band helps pull your knee into compensation, so you use your muscles to maintain proper tension and alignment during the exercise.
(2024: Still a fan of using your own muscles to correct positional problems)
90-90 Hip Transitions: These are a fantastic way to mobilize and loosen up the hips before activity. I also like them to discern if there’s a control issue somewhere along the chain. You go from transitions to a lunge and squat pattern during them as well here.
(2024: These are only helpful if you can get into this position correctly. If you try to get into the 90-90 position and your knee is barking at you loudly, how do you expect this to go? The inability to get into positions is a requisite to express movement where you want it.
You Have a Structural Problem
Spinal Compression Test
Take a seat and sit up tall
•Get into a good “posture” with your arms by your side (slight arch in your back)
•Grab the chair with your hands and pull up to compress your spine.
•Did you have pain in your back now that it we added a bit of compression in the rounded position?
•If so, it would mean that even when your spine is in a good biomechnical position, it doesn’t tolerate compressive forces well.
(2024: Oh the cringe I feel for feeding into this nocebo narrative. Look I can gather this same information subjectively from you. What does this test tell you? Posterior spinal tissue and potentially others are unable to handle a simple load going through them.)
Shear Test:
•Same as above but let your back round out
•Did this recreate your pain?
•If so, it would indicate that your pain is triggered by lifting out neutral, flexion intolerance.
(2024: Same for this crap…I mean this test. I could have gathered this from a conversation where you tell me being slumped or flexed hurts your back more and it feels better when you’re not in this position.)
What to do if these tests come back positive?
Flexion Intolerance
•Try not to slouch too much when standing or sitting
•When bending down to grab things, learn to hinge properly or kneel down in addition to improving core strength
•Lie stomach down a few times a day.
Extension Intolerance
When standing, try to vary positions. When seated, sit back into your chair.
Work on improving mechanics during movement and core strength as well.
Ultimately should you have an issue, be sure to visit a professional to help rule out any serious problems. The advice shared here should help the majority of individuals get on the right track, but you always want to be sure to not overlook a larger problem.
(2024: What if all these “tests” are done and it’s fine? You may discover you’re not flexion intolerant but extension intolerant as pain only happens with extension-based movements like standing positions. Advice would be the opposite focusing on less rigidity through the lower back and focus on fluidity with movement.
I suppose the problem is that when anyone has back pain, it’s such a nuanced problem specific to each individual. Therefore sifting through social media or any website will try to sell you a paint-by-numbers approach. Again, this may help some, but what about individuals who don’t get better? This all goes back to, no two presentations for back pain will be the same, even if they have an identical diagnosis.
Don’t buy a choose-your-own-adventure for your lower back pain, hire a qualified professional.)
Closing thoughts in 2024: The majority of insidious low back pain has a few things in common. Poor spinal segmentation and a lack of variable coordinated movement.
All “neutral” spine movements have flexion involved, in fact even in those that visually appear neutral throughout experienced spinal flexion through the lumbar vertebrae. (Thesis paper here).
The primary goal is to settle down any acute flare-ups
Manage the spine based on what it’s showing you.
Can it flex well?
Does it extend well?
Does any hinge point correlate with an area of lower back pain?
If it lacks sagittal plane movement, does it compensate sagittally or laterally?
How is this person’s breathing? Are they able to demonstrate good IAP (Intra-abdominal pressure)?
These are just a few things I’d would start with just from an observation standpoint. From there I would assess with my hands and put together the pieces of the puzzle along with the information I get from our discussion as to what to tell you and where to go with treatment.